 |
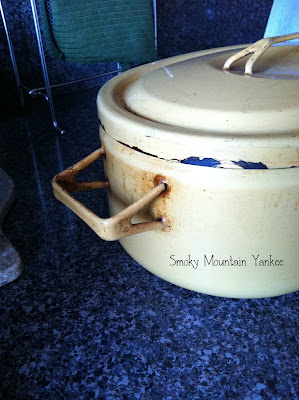
| Seppa Mallat - 1970's |
When It came time to cash out, can you believe I was holding my breath when I asked who much the pan was? Thank goodness I didn't have to pass out when I was quoted a price. Guess how much they gave it to me for? Come on guess? Are you ready for it? Drum roll please...
...$5.00!!!!
Yeah, that's right $5.00. Normally they charge $20. How did I get such a bargain, you ask? Well naturally it is my good looks and charm (said with a big cheese eating grin). Okay not really. The pan is badly weathered or as some would say, "seasoned" and apparently though I felt I could save the pan for use in my kitchen I leaned on faith that i had the skill to bring it back to life. If not, at $5, it would make a great planter for my herb garden.
 |
| One NASTY handle |
 |
| The inside shows signs of being well used. |
Upon bringing it home, I immediately began working on cleaning the pan. Momma taught we well, because with a little water, baking soda, lemon and salt and yes a smidgen of elbow grease the pan will be used in to make some mighty fine dishes. These are the steps I took to make the pan usable.
1.
I soaked the pan with
warm water, dish soap and baking soda (I learned later my step-dad added in powered
dish washing detergent). Sorry, I didn't measure anything, I just poured
the amounts in until I was comfortable (which means I probably used more than
what some would recommend).
2.
Let the pan soak for an
hour
3.
After the pan soaked for
about a half hour (can you tell I am a patient person), I dumped the water and immediately
began washing the pan with a washrag, soap and water. That took of the
top layer of softened grime. After I
gave it a good rinse, I immediately - without drying the pan - poured baking
soda onto the inside of the pan. Layering the bottom, I followed by pouring
vinegar on the baking soda making sure all of the soda would bubble. I
let the pan sit for 2 minutes.
4.
Next I squeezed lemon
juice (from a fresh lemon cut in half) on to the pan. It fizzed from the
other ingredients. I was going for the
science project, let’s see what would happen affect. I let that sit for a
15 minutes.
5.
I then poured a thin
layer of salt onto the bottom of the pan.
Immediately using half the lemon as a scouring pad (pulp face down) I
scrubbed the pan. You could see the
brown yucky stuff come off (sorry no pictures to show you because my hubby wasn’t
around and I didn’t want to touch my phone with my nasty hands).
6.
When I felt I had
scrubbed enough, I rinsed and saw the results….
 |
| Now, this is something I can use! |
Repeating the same steps, I attacked the outside of the pan. The only change in steps I made was, that I made a paste with the baking soda, vinegar and lemon juice. I coated the outside and let it sit for more than hour (only because I was a bit distracted by my mini me's running around). When it came time to scrub the outside, I used a soft wool pad with dish soap.
Here is the result...
 |
| All Clean and ready for use! |

No comments:
Post a Comment