Showing posts with label Recipe. Show all posts

Sunday, October 13, 2013

Pumpkin Puree Without the Blender


Pumpkin Puree Without the Blender


There is nothing like trying to eat around six pumpkins of various sizes that have been placed around your already seasonally decorated dinning room table.  They do not add to the decor, they where simply placed there as a resting place as we brought in the rest of the groceries a week ago and they never were moved.  

It only took a day or two for everyone to get use to the idea of the pumkins bign on the table.  Instead of a family style dinner, I would set up our meals like a buffet in the center of your dinning room table with zero order or decorating sense. Everything's just there.  Trying to pass the peas and roast beast (aka beef).  It's what we call it ever since watching some movie, but I can't remember which one...but I think it was the Grinch.) 

It's a good thing I have a really big table to host 9 people for meals.  Otherwise, I might feel bad that a few of those in my family would have to use the pumpkin as a place setting.  I don't know, I figure eating off the pumpkins might be a bit fun for the two year old and perhaps the 4 year old, but a bit awkward for the rest of us that are well...how can I say it? Well mannered and civilized?...Okay, yeah right. 


Now that it's just about the middle of October, I feel the need to bake. Though I do my best not to go hog wild on making everything pumpkin, especially the same recipes over and over again, I do go out of my way to make sure I have enough pumpkins for decorating and for making pumpkin puree, which I happily store in my freezer for just when the mood hits to bake anything pumpkiny.  

I have been asked how do I make my own pumpkin puree, and I have to say, it is one of the quickest and easiest things to do...I actually recruit the kids to help...but not this time, because time was of the essence and I really wanted to get the photo taken before I lost all the good light in the kitchen.  For any bloggers out there you know what's that like, right? 

Anyway, here is the skinny of how I create my pumpkin puree without taking out my blender which requires me to add water and then the annoying part of taking it apart to clean it.  

You ready?  Great...

You Will Need
Sugar pumpkin (really any pumpkin but, small enough to fit in the oven)
Foil
Cookie Sheet
Knife
Large metal spoon 
Large bowl
Ziploc bags
Sharpie Pen (or any marker will do - consider that it needs to be durable to withstand the freezer) 

 What To Do

First things first..preheat your oven to 300 degrees.  Next wash your pumpkin to rid of any dirt or any other gross stuff, like bugs or I don't know...just gross stuff.  Then line your cookie sheet with foil.  Place your dry pumpkin in the center of the pan and place in the oven for approximately 30 to 45 minutes, or until skin is a light brownish color.  

It you are not sure about the color, remove when the pumpkin is tender.  Simpy take a toothpick or skewer and poke it.  If it goes through easily, the pumpkin is ready to be removed from the oven.  

Pumpkin will have a burnt orange coloring and be tender to the touch. 

Once you have placed the pan on the counter, cut the top off and then cut into halves or quarters, depending on the size of the pumpkin.  

Use the metal spoon to lightly scoop out the seeds and the inside mushy pulp. 

Notice the darker orange pulp the seeds are attached to?
That is what you will remove with the spoon.

After you have removed all the seeds, scrape your pumpkin to remove all the pulp and place it in a mixing bowl.


Once the pulp is removed it will be really stringy...well because it is.  You can use it like this, but to be honest when you do, everything you  bake will have that pumpkin string texture running through it.  So, this is where I like to take out my handheld mixer (electric of course) and go at it usually on the second speed.  

Sometimes, I will use a spatula to scrape the sides to ensure that I've pureed every bit of pumpkin pulp.  

Half sort of pureed and half not...

It usually takes me anywhere from one to two minutes to puree a the pulp to a nice smooth consistency.

Tell me that doesn't look store bought...
The perfect Consistency
Since I do not wait until my pumpkins have cooled down to scrape the pulp out and puree with the hand mixer, once I have reached the right puree consistency I will let the bowl sit on the counter with waxed paper covering the bowl (that's just to keep any pesky flying things out but let air flow through without letting water in from condensation, which will change the consistency.  

After the puree has cooled for about a half hour to forty minutes, I will place two cups of puree into a freezer storage bag.  I'll then I will write on the bag the content and how much is in the bag for future use.  

Well BAM!  There it is easy peazy!  

Sunday, September 15, 2013

DIY Pantry: Pumpkin Spice

Pumpkin Season is here!!


You know what that means right?  Everything Pumpkin...that's right! Here it comes...The Bubba Gump  sound of!!

Pumpkin spice latte
Pumpkin pie
Pumpkin donuts
Pumpkin soup
Pumpkin pound cake
Pumpkin cookies
Pumpkin...I know, I know enough.

I can't help it.  We wait all year for this awesomeness and finally it is here.  I love pumpkins!

Well, to get you and myself ready, here is an awesome DIY Pumpkin Spice recipe you can use for baking and in your coffee.  Yes, I said.  Coffee!  What do you think Starbucks uses?  Okay,  maybe not this exact recipe, but it's pretty darn close.  My opinion its better.  At least you know what's in it. Just add cream and BAM, pumpkin yummy goodness latte!

Okay, back to the recipe. Here is the recipe that makes everything warm and cozy...it says cozy up and enjoy Autumn.

DIY Pumpkin Pie Spice: (This recipe yields 4 tablespoons)

Note: I encourage you to tweak this to your own liking.  

Ingredients:

2 Tbl. Ground Cinnamon
1 Tbl. Ground Ginger
1 tsp. Ground Nutmeg
1 tsp. Ground Allspice
1 tsp. Ground Cloves
1/2 tsp. Ground Cardamom (optional - I have a hard time finding this ingredient so I often leave it out)

Directions:

Combine all ingredients into a small bowl. Mix. and store in an air tight container.

Enjoy your pumpkin goodness!  Don't forget to share or make a comment.  Especially if you have a recipe that works well with your on DIY pumpkin spice.


Saturday, September 7, 2013

DIY Recipe: Apple Pie Spice

September is apple season here in New Jersey.

Battleview Orchards Pick Your Own - Freehold, NJ 


That means, while I get ready for everything pumpkin season, everything apple is here and it is on. No Bubba Gump sound of today...(only two hours sleep and my brain is resisting anything that sounds or looks like a list that was evident as I attempted to pour coffee into my son's Fruit Loops)

If you are like me, spending nearly $4 on 1.5 oz on baking spice is not an option.  Not only is the price enough to make me shake my head, but I am a bit uncomfortable with any ingredient, I cannot pronounce being added to extend the shelf life.  I don't want to have to question if in the long run am I harming my children's well being.

So here it is, Apple Pie Spice that you can do yourself.

This recipe yields about 1/3 cup. The measurements do not have to be exact and I certainly feel you should change things to your liking...

Ingredients:

4 tablespoons ground cinnamon
1 1/2 teaspoons ground nutmeg
1/2 teaspoon ground allspice
1 teaspoon ground ginger
1 1/2 teaspoons ground cardamom (optional - I know it is hard for me to find)


Directions:


Mix in a bowl and store in a container. If you have the time and talent (unlike me) find a small jar (like a baby food jar) and create your own labels...I don't do that kind of stuff (yet) why?..."'cause ain't nobody got time for that!" and I well truth be told, I threw out what little baby food jars I had, so I just reuse my original brand name container. Do whatever works for you.

Enjoy and happy baking.
Source 

Wednesday, September 4, 2013

Recipe: Slowcooker - Tomato Sauce

Not sure what to do with all those tomatoes from your garden?  Make sauce.

Not actually from my garden, but an awesomely cheap farmer's market. 

Not sure how to make sauce? Want to make it, but do not want to stand over stove all day? I got you covered.  Here's an easy breezy recipe for you, me and all those who have felt intimidated at thought of making homemade sauce.

If you are not sure what to do with all those tomatoes from your garden here is an easy-peasy way to make sauce.  It eliminates the standing on your feet and watching a pot...which for me with kids running around, I like the idea of not having the stove on for as long as it takes to make sauce.

So here it is...Tomato Sauce using the Crock-Pot or Slowcooker - whatever you choose to call it.


Note: This recipe called for dried herbs.  I used fresh from my garden to give it a more savory flavor...it worked.

Ingredients:
  • 4 lbs tomatoes (that's about 5 large tomatoes)
  • 1 Large clove of garlic
  • 1/2 Large onion, chopped
  • 1 Tb.  Fresh Oregano
  • 1 Tb. Fresh basil
  • 2 tsp. sugar
  • 1 tsp. salt
  • 1 tsp. pepper
  • 1 bayleaf

Directions:

Step 1: Throw everything in the crock-pot
No need to peel, core or remove seeds

2. Cover and cook on low for several hours.  Stirring occasionally.


3. Once the tomatoes have broken down, uncover; and continue cooking until you reach the desired consistency (expect it to take at least eight hours).


4. Run the tomato sauce through a food mill to remove the seeds and peels, or give everything a quick spin in a blender or food processor.


5. Pour your finished sauce into jars, taking care not to fill past the head-space line.

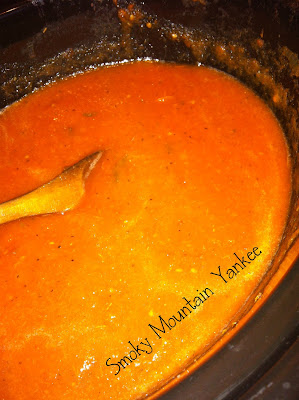
Tomato Saucy Goodness!
 Yeah, I am proud of myself!! I doubled the recipe making two 24 oz bottles.

You can freeze or can your sauce. 
To Can: Add one tablespoon of bottled lemon juice to each pint; two tablespoons to each quart. Water bath canned pints for 35 minutes, quarts for 40 minutes.
To Freeze: Allow the jars to cool. Then, place in the freezer. Use within a year, for the best quality.

DIY Recipe - Self-Rising Flour Blend

I recently found a recipe that required me to use self-rising flour.  Being honest, I didn't even know there was such a thing. Which was really a bummer because I really wanted that cake.

You can bet your bottom dollar that the next time I had to pick up a few staple baking goods at the grocery store, I took a glance to see if there was such a thing.  And wouldn't you know not only is there self-rising flour but quite a few other varieties of flour as well.

I didn't pick any up, because it was $2 more than regular, good ole fashion all purpose flour. Don't get me wrong, I contemplated buying it for a moment...it's just that I am cheap (I know, there is that word again...frugal if it makes you happier. And I couldn't justify the cost when that money would buy milk or bread.

Then I came across this little ditty, All You Magazine, September 9. 2013 Issue number 9.  Perusing through the pages as I waited for my husband to finish using my laptop

Note: it's the only computer in the house and I have deemed it mine since I use it the most...is that fair?...oh well,  let them eat cake!

Back to the post.

So, I was cruising through the pages of the news issue of All You Magazine and I found a recipe for self-rising flour blend.  WHAT?  Oh it's on now!  Bake me a cake and mark it with a "B" it's not yet in the oven, but soon it will be.

Thank goodness for internet because, now you can have this recipe...Now that I think about it, this is probably posted elsewhere, and I could have found it way before now.  Well, let's just say I am an underslept (is that a word?)  mother of four and so the brain doesn't work like it use to.  The excuse works for me.

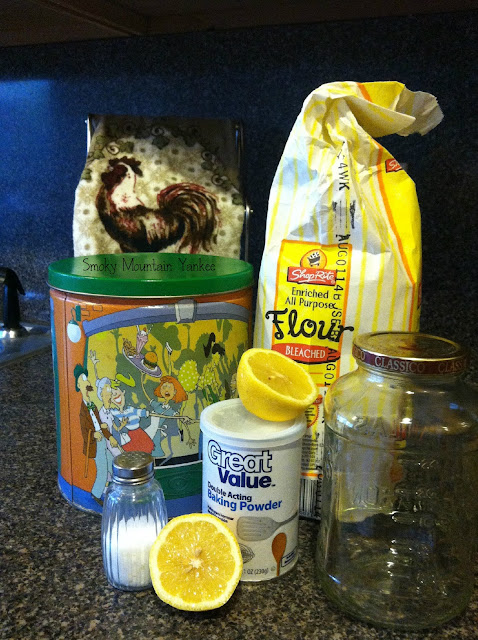
All the necessary ingredients for self-rising flour - MINUS the lemon and Mason Jar.
I have no idea why I put them in the picture.
The Soda Shop tin is what I hold my all-purpose folder in. 


Self-Rising Flour 

A bit of "Did you know?": Self-rising flour is a soft flour (I am not sure what that means, except maybe it has been sifted a few times).  It is flour that has salt and baking powder already added.

1 cup all purpose flour (if you have pantry flour use that for more tender baking goods)
1 1/2 tsp DIY Recipe: Baking Power
1/4 tsp. salt

Simplest Directions Ever:
Sift flour into a bowl. Whisk all ingredients and flour together.  Baking according to your recipe. Enjoy the yummy goodness you have created.

Note: If your recipe requires more than one cup of self-rising flour, for each cup of flour measure each ingredient as instructed.

Enjoy and Happy Baking! 

Wednesday, August 28, 2013

DIY Recipe: Herb Rub

I was watching a culinary show a few years back when they were talking about making a rub for a side of beef. They mentioned the same would work for poultry.  At that very moment, the light bulb went off and a culinary adventure began.

I gathered up a few spices and dried herbs and I made my first rub.  Since then, I have tweaked the recipe to make it my own and certainly based on what type of meat I am fixing the recipe will require changes.


This basic rub goes well with poultry, beef, and can be added into homemade pasta.  I use all dried herbs from garden and purchased from the store.  This recipe is great and will works well as a dry rub also.  

1  tsp. Rosemary
1. Tb. Crushed Sage
2 tsp. Thyme
1 1.2 tsp. Basil 
1 1/2 tsp. Oregano
1 tsp. Garlic Powder
1 tsp. Onion Powder
1 1/2 tsp. Salt
1/2 tsp. Pepper
1 Tb. Cooking Oil (Olive or vegetable are fine.)

Note: Omit oil  if you want a dry rub or using it in pasta sauce.

Place all ingredients into a small bowl.  Mix with a fork to break up any clumps. Pour oil in with dry ingredients and stir.  With hands rub spread rub over meat evenly.  Cook your meat as required.  For best results, have the meat sit in a sealed container, plastic bag or wrap an hour or more before you cook it.  The more it sits the better the flavor but no more than 24 hours.

Well, what do you think?  We love to share, so go ahead and pass this a long or tell us what you use.  I love to try new recipes.

Sunday, August 25, 2013

Garlic House Butter

Oh my goodness!  What have I stumbled upon on date night?  Something that has made me rethink how I will cook and serve steak and burgers. 

What is it that made me go on the hunt to find that unique flavor that had my taste buds wanting more, more, more with every bite?  Why was I singing, “Feed Me Seymour” from Little Shoppe of Horrors? 

Source
Garlic Maison (House in English) Butter!!!  What?  Yeah this yummy, savoy goodness has changed my life. Okay maybe not my life, but definitely my culinary choices.

Oh okay, I know this butter is not new.  But, I promise you, I have never had it and I am enamored by it…I am in love, love, love with it.   I recently discovered how to make this savory awesomeness and you can best believe, it will be on my next home grilled steak (which is far few between) or hamburger.  The coolest part of making this recipe, it is incredibly easy and every ingredient, I was happy to find, is already a staple in my home…even the fresh herbs.  Yay, me for braving the idea of growing my own herbs. 

This recipe yields 1 pound of butter, which is the equivalent of 4 sticks of butter, which works for me because I have quite the number of mouths to feed with a family of six, plus three. 

Ingredients
2 tablespoons minced garlic (about 6 large cloves)
2 tablespoons plus 1 pound unsalted butter, softened
1 tablespoon minced fresh thyme leaves
1 tablespoon salt
1 tablespoon black pepper
1 lemon, juiced

Directions

  1. Combine in a bowl 1 pound of softened butter, thyme, salt, pepper and lemon juice.
  2. Over medium heat, add two tablespoons of butter and toast the minced garlic until they are brown…not burnt. 
  3. Add browned garlic and butter to the rest of the ingredients and mix well.
  4. Place butter into plastic wrap or an air tight container. Refrigerate until needed.

This recipe takes less than 10 minutes to make and about a half hour to set in the ‘fridge.  Is there something that you add to your burgers and steaks to make them irresistible?  If you try this butter, tell me your thoughts and don’t forget to share this post. 


Thursday, August 22, 2013

Buttermilk Powder Biscuits

It is my very humble opinion, a meal is not complete unless you have a biscuit or two to accompanying it. My husband says that is very southern of me.  It's embedded in me, I grew up in the South...well the Southwest anyway.

To me, biscuits are the ultimate comfort food and and the most versatile. Sounding off like Bubba, from Forrest Gump, you can have: butter biscuits, buttermilk biscuits, cheesy biscuits, herb biscuits, garlic biscuits, blueberry biscuits,...oh ok, you get my point. 

It has taken me three years to perfect these biscuits.  Especially since my favorites from KFC - that's Kentucky Fried Chicken just in case anyone still calls it by it's long name), and Red Lobster are not in our budget to buy each desired comfy meal.  

It only took three years, and can you believe, it's all because we ran out of milk, had not even two pennies to rub together and we needed a quick alternative.  And here it is...the secret ingredient...


Dehydrated Powder Milk. $3.54 at Walmart  

Thank you mom, for leaving it at my house! All we needed to do was measure and add water.  What a lifesaver!! But, there was one problem. This amazing powdery goodness that would make up to 10 gallons of buttermilk for no where near the cost of the liquid version, had hardened.  I am not sure, but, I believe the humidity from when our air condition unit was down moistened the powder and then it dried.  At first glance, unusable.  For most, this would be thrown away.

Rock hard dehydrated buttermilk
Feeling the desperation of needing my biscuits, I grabbed a spoon and started scrapping  the surface to generate a powder. How hard can it be? I only needed 3 tablespoons. Well it was this hard...

Hammer and Chisel Hard.

Go ahead, say it!  We did, "WOW!" while laughing out loud.

I know what your thinking, "Come on!  Why didn't you just throw it out and go get milk or better yet buttermilk"? Well for one, like I said, I'm stubborn...very stubborn. Two, I'm cheap or if you want to be nice about it, I am frugal. So if it can be used I'll find a way. But most importantly, on this particular day and this should probably be the number one reason. we didn't have two pennies to rub together. So due to all of the reasons combined we used what we had and in the end, we gave thanks to God for it. 

So, after we chiseled enough of the dried buttermilk, I had to grind it into a powder. I don't know who I am more grateful for.  My husband for Chiseling the block for me or the $10 Cuisinart Coffee grinder.  My husband of course. But, I can't deny, that grinder, for now is a close second.   

So after the craziness of saving the dehydrated buttermilk powder and grinding it back into a powder, we had made biscuits. The best we had ever had...yeah I mean better than KFC good.

We had found a winner and we had decided to finish using the rest of the block of buttermilk and only hope that with purchasing a new carton of the powder it will not harden once opened and stored in the 'Fridge.


One awesome shaped biscuit, the rest was me being sloppy.

Here's the recipe, but I have to warn you, these biscuits turned out so good it would be nearly impossible to eat just one. So Give it a try and tell me what you think.

Buttermilk Biscuits

1/2 Cup Shortening
2 Cups All-Purpose Flower (if using self rising flower omit baking powder and salt)
1 Tablespoon Sugar
2 Teaspoon Baking Powder
1/4 Teaspoon Baking Soda
3/4 Cup Buttermilk

Yields: 12 biscuits
  1. Heat Oven to 450 degrees
  2. Cut shortening into flower, sugar, baking powder, baking soda and salt by using a pastry blender or by crisscrossing 2 knives (I simply use my hands), until mixture looks like fine crumbs (like cornmeal).  Stir in milk until dough leaves sides of bowl.  Note: the dough will be soft and sticky)
  3. lightly flour a clean and dry surface. Place dough on surface and lightly knead the dough about 5 to 10 times.  Add flour as needed if the dough remains sticky.  (it should not be dry, but just moist enough to touch without sticking to your fingers).  Roll or pat out the dough to about 1/2 inch thinkness.  Cut the with a flour cutter. 
  4. On a lightly greased cookie sheet, place the cut dough about 1 inch apart. 
  5. Bake for about 10 to 12 minutes until golden brown.  Immediately remove from the cookie sheet placing them on a cooling rack.  
  6. Optional: Butter tops and bottom...yeah I do the bottoms too.  
Healthy Info Stuff: 
1 biscuit is about 160 calories (calories from fat 80); Fat 9g (Saturated 2g); Cholesterol 5ml; Sodium 310mg (not including added butter); carbohydrate 18g (dietary fiber 0g); Protein 2g. 

Share a recipe, tell me what you think...we love comments.  Nice ones that is....